Creating AI Agents with AgentStack
In this article, we will explore a five-step process to create your own AI agents using AgentStack. AgentStack is a library that simplifies the process of creating AI agents by providing a simple installation, creation, and addition of agents and tasks.
Introduction to AgentStack
AgentStack is a powerful tool for creating AI agents. It allows you to install, create, and add agents and tasks with ease. To get started, you need to install the AgentStack library by typing pip install agentstack in your terminal.
 This is the screenshot of the AgentStack installation.
Step 1: Installation
The first step in creating an AI agent with AgentStack is to install the library. This can be done by typing pip install agentstack in your terminal. Once the installation is complete, you can create your first project by typing agentstack init followed by the name of your project.
Step 2: Adding Agents and Tasks
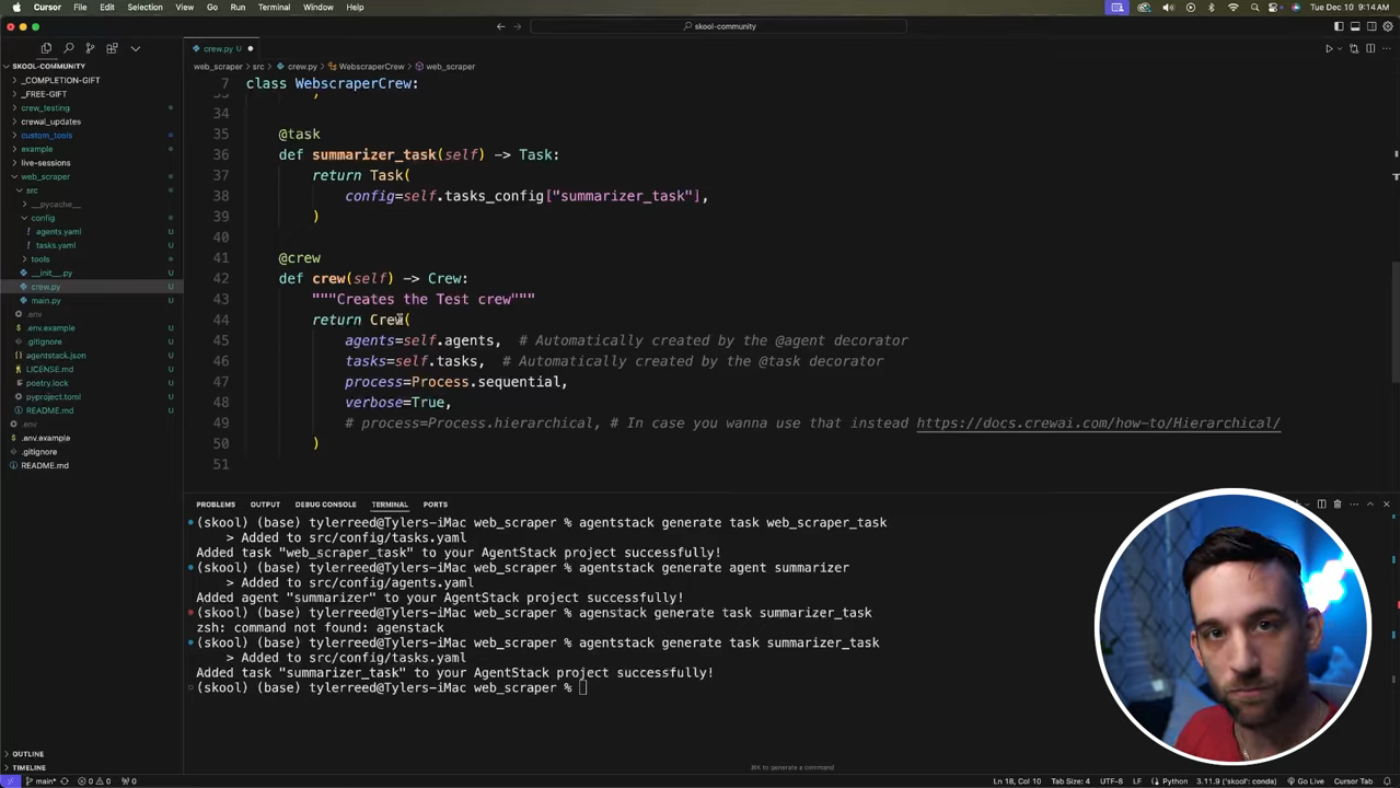
The second step is to add agents and tasks to your project. You can do this by typing agentstack generate agent followed by the name of the agent you want to create. For example, agentstack generate agent web_scraper. You can also add tasks to your agent by typing agentstack generate task followed by the name of the task you want to create.
 This is the screenshot of the agent and task creation.
Step 3: Adding Tools
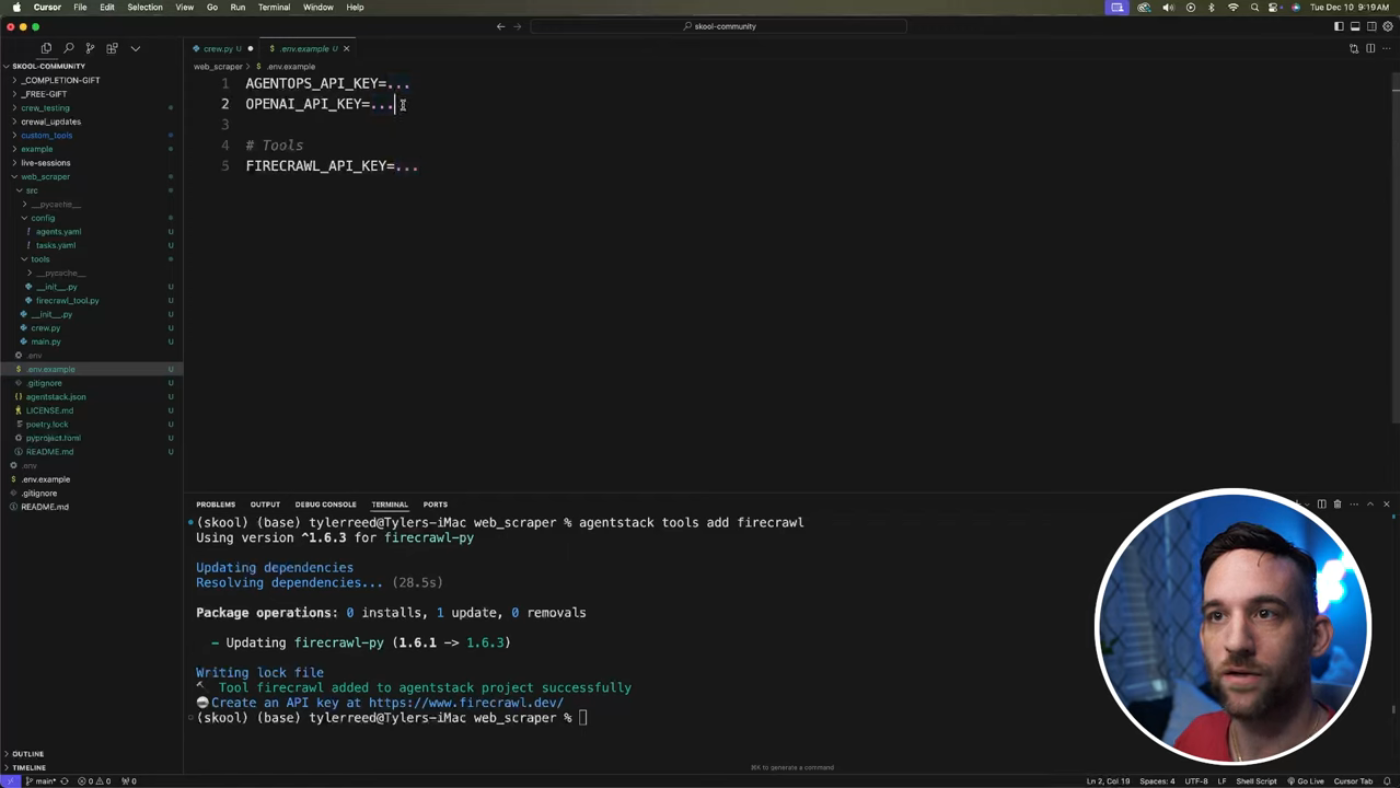
The third step is to add tools to your agent. You can do this by typing agentstack tools add followed by the name of the tool you want to add. For example, agentstack tools add fir_crawl. This will install the fir_crawl tool and add it to your agent.
 This is the screenshot of the tool addition.
Step 4: Adding Prompts
The fourth step is to add prompts to your agent. You can do this by filling in the prompts in your agent's configuration file. For example, you can add a prompt to scrape a website and return the markdown.
 This is the screenshot of the prompt addition.
Step 5: Running the Agent
The final step is to run the agent. You can do this by typing agentstack run in your terminal. This will start the agent and execute the tasks you have defined.
 This is the screenshot of the agent run.
Conclusion
In this article, we have explored the five-step process of creating an AI agent with AgentStack. We have covered the installation of the library, adding agents and tasks, adding tools, adding prompts, and running the agent. With AgentStack, you can easily create AI agents and automate tasks with ease.
 This is the screenshot of the AgentStack conclusion.
By following these steps, you can create your own AI agents and start automating tasks today. Whether you're a developer, a business owner, or just someone looking to automate tasks, AgentStack is a powerful tool that can help you achieve your goals.
