Introduction to Make.com Automation
Are you tired of boring and repetitive tasks at work? Do you want to save time and boost your productivity? Look no further! In this article, we'll explore how to use Make.com (formerly Integromat) to automate just about anything. Whether you're new to automation or looking to enhance your skills, this tutorial is perfect for you.
What is Make.com?
Make.com is a powerful automation tool that allows you to connect thousands of different apps and services, creating complex workflows without coding. It's free to start using, with a free account offering 1,000 operations per month. With Make.com, you can automate tasks, streamline workflows, and focus on what truly matters.
Example Workflow: The Kevin Cookie Company
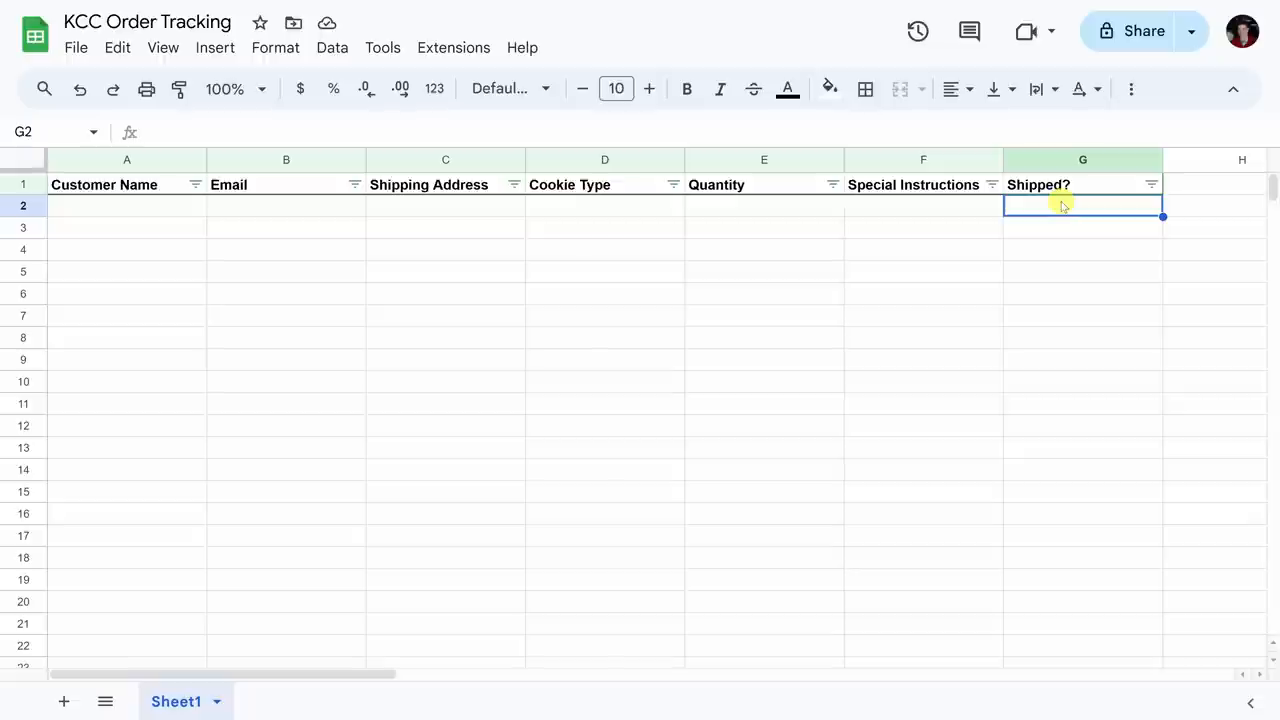
At the Kevin Cookie Company, customers submit orders using a Google Forms order form. Typically, this process involves manually entering the order into a tracking sheet, sending confirmation emails to customers, and notifying the fulfillment team. This can be time-consuming and prone to errors. We'll show you how to automate this entire process using Make.com, saving valuable time and ensuring accuracy.
Getting Started with Make.com
To get started with Make.com, head to the website and sign up for a free account. With a free account, you get 1,000 operations per month, which is plenty to test and experiment with how it works. You can set up a number of scenarios with that, and if you decide to go pro, you get a free month, 10,000 operations, and additional features.
Connecting to Google Forms
To connect to Google Forms, click on the "Templates" button on the left-hand side of the Make.com dashboard. This drops you onto a page with thousands of different templates that show you how to connect to various applications. Search for Google Forms, and click on the "Watch responses" trigger. This will open up a dialogue where you'll need to establish a connection with Google Forms.
Setting up the Scenario
Once connected to Google Forms, you'll need to set up a scenario. Click on the "Scenarios" button on the left-hand side, and then click on "Create a new scenario." This will drop you into the scenario editor, where you can start building your automation. At first glance, it might look like there are a lot of different options, but don't worry, we'll make sense of them.
Adding a Module
To add a module, right-click on the canvas and select "Add a module." Alternatively, you can click on the "Add another module" button. This will open up a screen that shows you all the different apps you can connect to. Search for Google Sheets, and select the "Add a row" action. This will open up a dialogue where you can configure the module.
Mapping Data
In the configuration panel, you'll see a section for values. Here, you can map the data from the Google form to the Google sheet. You'll need to select the columns in the Google sheet where you want to add the data. For example, you might want to add the customer name, email address, shipping address, cookie type, quantity, and special instructions.
Testing the Scenario
Once you've set up the scenario, you can test it by submitting a sample cookie order form. Fill in all the details, and click submit. Then, go back to Make.com and click on the "Run once" button. The scenario should now run, and you should see the data appear in your Google sheet.
Adding a Filter
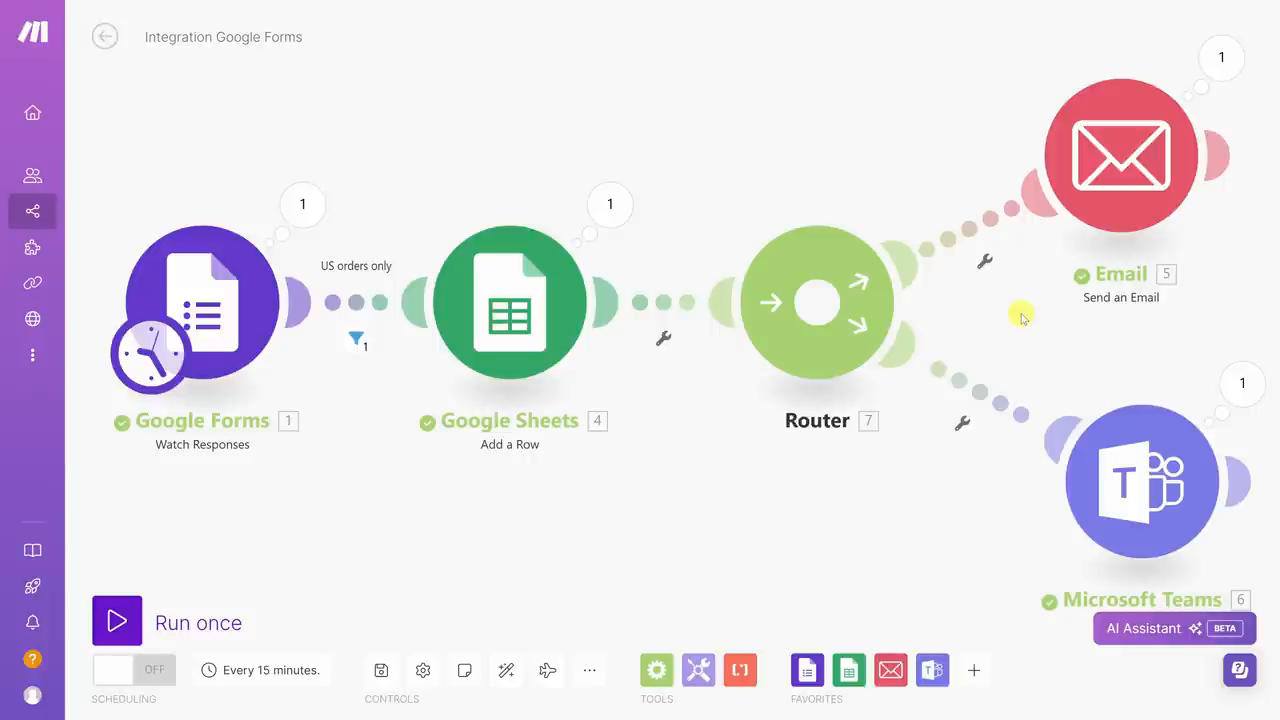
To add a filter, click on the icon between the two modules. This will open up a dialogue where you can set up a filter. For example, you might want to filter out orders from outside the US. You can set up a condition that checks the shipping address to see if it contains the United States.
Adding a Router
To add a router, click on the "Add another module" button, and select the "Router" module. This will allow you to send the data to multiple places at once. For example, you might want to send the data to both an email and a Microsoft Teams channel.
Scheduling the Scenario
To schedule the scenario, click on the toggle button in the bottom right-hand corner. This will turn scheduling on, and you can configure the schedule. You can set the scenario to run at regular intervals, or on specific days of the week or month.
Conclusion
In conclusion, Make.com is a powerful automation tool that can help you save time and boost your productivity. With its user-friendly interface and vast library of templates, you can automate just about anything. By following this tutorial, you should now have a solid understanding of how to leverage Make.com to automate your daily tasks. Remember to experiment with different scenarios, and don't be afraid to try new things. Happy automating!


